I officially had my first crocheting lesson.
It began with me explaining to Becca (my instructor/friend/bridesmaid/person selling me her barn apartment) the assignment as well as my goal for making a baby beanie. With that in mind, Becca was able to explain the foundational skills that I will need to know in order to build up to making the beanie. Together, we established our goals for our first lesson lesson.
Session # 1 Goals:
1.) Master the slip knot...not this, but this.
2.) Learn the correct crocheting form (who knew there was such a science to this!)
3.) Practice creating a simple chain
4.) Learn who to turn so that I can go back the other way
So, first things first . . .
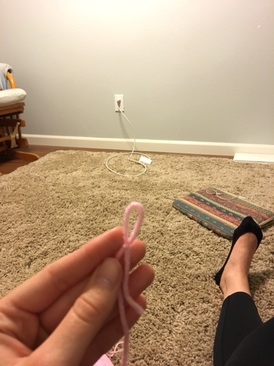 | Slip knots. They do "knot" seem like a daunting task, but boy was I confused! I had to watch Becca do the knot 5 times before truly understanding the magic behind it all. After two failed attempts, I finally got it! Apparently, the third time really is a charm! The point of a slip knot is to essentially have a starting point in your crocheting chain. <------- This little guy truly did give me a little bit of grief, but the good news is that you only have to create the slip knot once every time you begin a project. Moving on to crocheting form... |
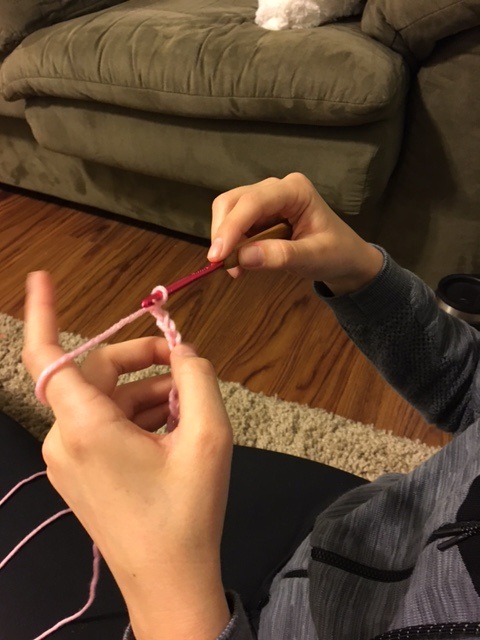 | I never truly struggled with my fine motor skills . . . until now. Holding your hands in the correct position during crocheting, was probably the most difficult part of the whole process. The picture on the right is what the form is supposed to look like, the picture on the left is my form. |  |
Although they are similar, I still have a long way to go in order to have perfect form. However, amongst the many failures that came with tangling string, not having the correct size openings, and balancing the perfect amount of slack, I was actually able to figure out my own version of how to hold the needle and yarn.
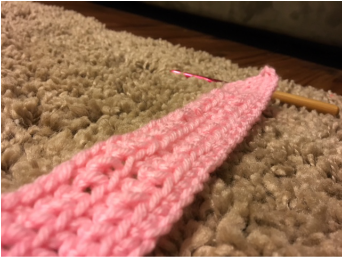 | nThis was the finished product after my first hour of crocheting. I was able to master both the pattern for creating a chain as well as how to turn around to go back the other way. It does not sound like rocket science, but it definitely required more brain power than I originally anticipated. I thought that I was going to be able to be quick at this right off the bat, but after one too many mistakes, I realized that slow and steady will win the race for now. I soon became addicted to the |
"sport" of crocheting. I crocheted straight through Jeapordy! and American Idol. I actually got quite good at the simple chain. And then . . . this happened . . .
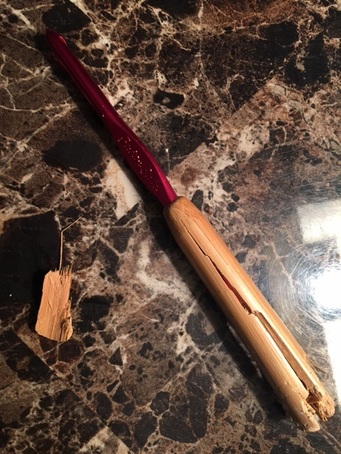 | Much like the "dog ate my homework" excuse, my dog at a vital piece of my 20Time Project. When you own a 165 lb South African Boerboel, you quickly learn that it is an "own at your own risk" type of deal. Although my dog, Nani, is the biggest teddy bear in the world, she has been known to eat things such as: my shoes, curling iron, basketballs, etc. I had left my crocheting station for 1 minute when I heard a big crack! in the living room. I guess she felt left out! So, we can officially add "crocheting needle" to the list of things eaten by Nani. However, it was only a minor hiccup in my journey to crocheting. Rather than purchasing a new needle all together I called |
| on a little bit of tape to patch up the damage. In no time at all, I was back to crocheting. After my first day, I feel like I really did reach the goals that Becca and I had originally established. I was able to: -Make the slip knot -Pick a crocheting form that works best for me -Create a simple chain -Turn around I definitely feel accomplished and like I progressed significantly within just one day with this new skill. Stay tuned to see how my next lesson goes! | 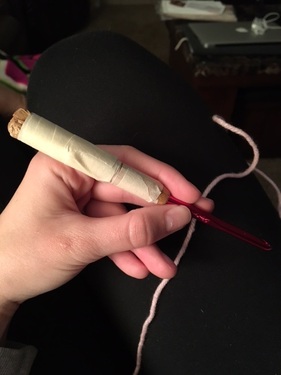 |
 RSS Feed

.jpg)